Monday, 31 March 2008
Sunday, 23 March 2008
Easter treats part two: egg nest vanilla cupcakes

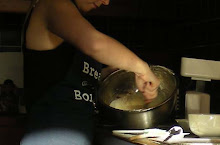
As the photo shows the kitchen was rather busy on Thursday afternoon. Having finished my work for the day I started making all the Easter treats at around 3pm. I had ciabatta proving, roast tomatoes cooling, hot cross bun dough resting and the came the cupcakes. Oh yes, there had to be cupcakes!
Having just posted about how rarely I use the Kenwood I have to admit that it got a good outing on Thursday. All stages of the cupcakes called for it. I think it must have felt rather smug to have usurped the bowls (which to be honest were full of hot cross bun-y goodness!). I wanted to make a plain cupcake that I could decorate with a predictable Easter theme, egg nests.
I chose the Magnolia Bakery vanilla cupcake recipe that everyone raves about as the base and decided that I would finally attempt a ganache icing. N's birthday is coming up and when asked about what sort of cake he might want he said there was a certain type of icing he would really like. I have spent the last few weeks pointing to pictures on the front of food magazines, cakes in the windows of shops and photos on the web and finally figured out that it is probably a chocolate buttercream ganache. In order to be sure about this I thought that I could use it on my Easter cupcakes, as the colour and swirled piping would make it perfect for imitating a birds nest, and it would allow N to try it and confirm I was right.
So I made a batch of vanilla cupcakes and then mixed a ganache, piped it on and added mini-eggs. The result, a lovely textured but plain cupcake with a nicely rich cute topping. The plain cupcakes meaning that the overall combination wasn't too over the top. I was really pleased.

N was also delighted, not only because he got cupcakes, but because the icing was indeed what he hoped for. We took them away with us on our country break to sustain ourselves. A good job too because it snowed and there is nothing like curling up in front of Match of the Day with a cup of tea and indulgent cupcake, with the snow swirling outside the window.
I also made six mini-cupcakes and iced them, this time adding a variety of sprinkles rather than eggs. I hide them in an egg box and presented them to N this afternoon as a treat for in front of the football. It was so quaint I couldn't resist!
 And now for the recipes:
Vanilla Cupcakes: Adapted from Magnolia Bakery recipe (I don't actually have their book yet, but I am hoping to pick it up asap)
Makes 12. (I cut it down to this as the original made 24 and that was way too many for me)
1/2 + 1/4 cups self-rising flour
1/2 + 1/8 cups all-purpose flour
1/2 cup unsalted butter, softened
1 cups sugar
2 large eggs, at room temperature
1/2 cup milk
1/2 teaspoon vanilla extract
Preheat oven to 180 degrees.
Line a 12-cup muffin tins with cupcake papers.
In a small bowl, combine the flours. Set aside.
In a large bowl, on the medium speed of an electric mixer, cream the butter until smooth. Add the sugar gradually and beat until fluffy, about 3 minutes. Add the eggs, one at a time, beating well after each addition. Add the dry ingredients in three parts, alternating with the milk and vanilla. With each addition, beat until the ingredients are incorporated but do not overbeat. Using a rubber spatula, scrape down the batter in the bowl to make sure the ingredients are well blended. Carefully spoon the batter into the cupcake liners, filling them about three-quarters full. Bake for 20–25 minutes, or until a cake tester inserted in the center of the cupcake comes out clean.
Chocolate Buttercream Ganache:
(I actually halved the following and it made enough to ice 6 large and 6 mini cupcakes)
8 ounces bittersweet chocolate
3/4 cup whipping cream
1/4 cup butter , room temperature
2 cups powdered sugar
1/4 teaspoon salt
1/4 cup whole milk
1 teaspoon vanilla
1. Chop chocolates and transfer into a heat proof bowl.
2. Heat cream until bubbles form around the edge of the pan, pour cream over the chocolate.
3. Let sit for 1 minute then stir until combined.
4. Add butter to the chocolate (make sure its soft and at room temp) and stir until combined.
5. Whisk together sugar, salt, milk, and vanilla in another bowl until combined.
6. Pour the sugar mixture onto the chocolate mixture, then stir until combined and smooth.
7. Let sit at room temperature until thickened.
8. Beat with an electric mixer until fluffy.
9. Pipe onto cupcakes when they're completely cooled.
Easter treats part one: hot cross buns
I'm not religious in any way and neither is N, so celebrating Easter might seems like an odd thing to do in Our Lovely Flat (tm). However, since it was a Pagan festival stolen by the Christians, which has since been re-appropriated by the Capitalists I figure that the food lovers out there are well within their right to borrow the occasion as an excuse to make some damn fine food. After all I think any great food could be considered sacred, and I don't need any excuses to worship at the table!
To be honest, I don't need an excuse to try making homemade versions of food that I really enjoy, in fact I don't need any excuse to make any tasty food at all, but Easter did provide an opportunity to make a whole lot of it at once! Having made my own stollen at Christmas I just couldn't resit trying my hand at the classic hot cross bun. I love hot cross buns, they combine so many things that I enjoy, bread, spices and toast (because I think the best way to enjoy them is toasted to bring out the spices, then slathered in butter!).
Fortunately one of my favourite cookbooks The River Cottage Year by Hugh Fearnley-Whittingstall included what looked like a great recipe for hot cross buns, and having cooked a number of things from it that have worked out perfectly I knew I need look no further. (I seriously can't recommend this book too highly, I can't wait to see what the Summer month recipes hold in store for us).
The smell of the dough was so fantastic. All spicy with a hint of orange, lemon and yeast. I was so excited about the whole thing that I totally forgot to look at how many the mix would make. So when it came to dividing the dough I was peering at the recipe reciting "cut into 2, then 4, then..." pauses and reads on, "ah, 16, that's rather a lot..." Oops! I must admit I wasn't too disappointed, in fact I was rather pleased. You can never have too many hot cross buns in my opinion.
It was so much fun making the plain flour dough for the crosses. It really felt like I was making proper professional food. I was so smug. N arrived home from work just as I was pasting the crosses on and his face lit up in a grin.
It was hard to resist not breaking one or two open when they came out of the oven and start eating them immediately, but somehow our will power held and they managed to be kept for breakfast. They were delicious and H F-W was right, the didn't have a yeasty flavour at all, just the gentle tones of mixed spice and the slight hint of orange and lemon. Perfect.
So, another thank you to H F-W, another great breakfast, and another successful food adventure.
I'm afraid I'm not going to post the recipe as it is a whole page of the book and quite frankly I can't be bothered to copy it out. I'll just leave you with the photos to make you all jealous! - Plus you should buy the book, it's brilliant.


Ciabatta: stage two
Here finally is my slightly belated ciabatta update. Everything got a bit mad in the preparations for Easter, but I shall post it all in good time.
Having rested the ferment for the ciabatta for 24 hours it was looking and smelling all yeasty and bubbly and really seemed like it had a life of it's own! Look it's all stretchy and fermented:

I added it to the rest of the ingredients and began the final process that would take us through to having fresh hot ciabatta to welcome in the four day weekend. I was slightly concerned as the dough was really wet and in the end I did end up adding lots more flour with it to make it manageable. I wasn't sure if I should have, but I wanted a dough I could shape properly.
The massive amount of dough the total mix made meant I could make four large loaves.

They rested again once they'd been shaped, and then I stretched them out slightly and put them in the hot oven. Having added lots of additional flour I really wasn't sure how they'd eventually turn out, they smelt good, but would the taste and texture be alright?
Oh yes! They came out of the oven smelling amazing and actually looking like ciabatta.

Then we cut into them. I wish the steam had been picked up in this photograph, along with the smell. It was so satisfying.
 So, while it was still hot, we divided the bread between us, dished up some of the roasted tomatoes I'd also made earlier, added olives, freshly grated parmesan and a touch of balsamic vinegar and oil. Voila! A perfect and extremely delicious meal served with cold white wine.
 There really couldn't have been a better way to welcome in the weekend. Well, at least we didn't think so.
p.s. recipes for the ciabatta and roasted tomatoes to come later when I can be bothered to type them up. Right now there are more important things to be doing: the Arsenal match is about to begin...
Having rested the ferment for the ciabatta for 24 hours it was looking and smelling all yeasty and bubbly and really seemed like it had a life of it's own! Look it's all stretchy and fermented:

I added it to the rest of the ingredients and began the final process that would take us through to having fresh hot ciabatta to welcome in the four day weekend. I was slightly concerned as the dough was really wet and in the end I did end up adding lots more flour with it to make it manageable. I wasn't sure if I should have, but I wanted a dough I could shape properly.
The massive amount of dough the total mix made meant I could make four large loaves.

They rested again once they'd been shaped, and then I stretched them out slightly and put them in the hot oven. Having added lots of additional flour I really wasn't sure how they'd eventually turn out, they smelt good, but would the taste and texture be alright?
Oh yes! They came out of the oven smelling amazing and actually looking like ciabatta.

Then we cut into them. I wish the steam had been picked up in this photograph, along with the smell. It was so satisfying.
 So, while it was still hot, we divided the bread between us, dished up some of the roasted tomatoes I'd also made earlier, added olives, freshly grated parmesan and a touch of balsamic vinegar and oil. Voila! A perfect and extremely delicious meal served with cold white wine.
  There really couldn't have been a better way to welcome in the weekend. Well, at least we didn't think so.
p.s. recipes for the ciabatta and roasted tomatoes to come later when I can be bothered to type them up. Right now there are more important things to be doing: the Arsenal match is about to begin...
Wednesday, 19 March 2008
Ciabatta: stage one
It's Easter weekend coming up and N and I are taking advantage of the long weekend to escape into the country for a few days. It's a break that we both definitely need and as ever I have been plotting and planning all sorts of little treats to take with us.
I was daydreaming earlier (while I should have been working) thinking about how tomorrow night is officially the start of our amazing long weekend and how we should have something special to celebrate. I was also thinking about how it's been a little while since I did something crazy, different and difficult in the bread department. Since we started the fresh homemade bread resolution I have been sticking to the easy breads, not wanting to try anything too difficult or out of my comfort zone. But, seeing the bushy basil plant on the side, the great mix or large and cherry tomatoes that arrived from Abel and Cole this morning I was reminded of our conversation about how delicious simple food is when it's just right (this during some gushing over the bread, oil and salt starter when N took me out for a celebratory dinner on Sunday night - yes, I know, he's amazing).
So I came up with a plan. I am going to make ciabatta! Then tomorrow night we can have the nice bottle of white wine with fresh hot ciabatta and tomatoes, basil rock salt and balsamic vinegar, perhaps with a hunk of cheese on the side. Good, simple, tasty food to welcome in the weekend. So I have started the process. It takes 24 hours to make a ferment for the bread, so I mixed it this afternoon, covered it and left it on the side. It currently looks like this:

Then tomorrow afternoon I add the other ingredients and then mix again, leave it to prove a while longer, then tomorrow evening we should have tasty fresh homemade ciabatta bread. I'm really excited. Another first for the recipes and omething that pushes my comfort zone and should hopefully bring about not only a feeling of achievement but a delicious dinner too!
Updates to follow tomorrow (and other tasty Easter related treats of course!) ...
Tuesday, 18 March 2008
Vital equipment
Okay, so you've got your shoes, and you've donned your apron. Now what? Well it's time to get baking of course!
As my Mum so astutely pointed out this week the header on this blog is somewhat misleading: it suggests that the Kenwood mixer is a bigger part of my baking than actually it is. Don't get me wrong, I adore the Kenwood (I wouldn't have gotten away with stealing it away from my Mum and asking N to drive it back down from my parent's house, cart it into our flat and help find storage space for it if I didn't) however, let's be honest, it's not the lightest or smallest of kitchen accoutrements. Now, I know that these two things are not what one should necessarily look for in a stand mixer, especially as I dream that one day (in a bigger kitchen) I will have my very own Arsenal-red Kitchenaid. However, since there is very little actual surface space in our kitchen the Kenwood must be stored in an overhead cupboard and being a the "shortass" that I am I have to either bat my eyelashes at N and whimper for help (quietly suggesting that whatever baking goodness I am contemplating won't happen otherwise) or, as in most cases, perilously stand on one of our wobbly dining chairs and heave it from above my head and onto the counter (whatever you do don't tell my father I do this, he'd have a fit!).
So, to cut a long story short, it doesn't get out much. It is amazing for whipping cream (as on this occasion), or getting perfectly smooth and blended cream cheese icing (as on this occasion), and I couldn't manage soups without it's fantastic blender attachment.
But for day-to-day baking, I am my Grandmother's grand-daughter and still, and will probably always, prefer the romance of mixing by hand. It's just nicer and more satisfying to see the sugar and butter cream together perfectly under your own power, to watch the swirls of marbled batter as the chocolate combines with the egg and flour. Okay, so it's not the fastest way to get things done, but it just feels right. Plus it (hopefully) burns off a few of those calories you're about consume whilst licking the spoon!
Now, to get down to the real business of this post. In order to enjoy mixing by hand there are two things you need. The first (and I would argue slightly less important) is a good spoon. I use one of three standard wooden spoons, depending on which I manage to grab from the pot first. The only real thing worth noting about the three spoons I use for mixing is that they are short and small. I somehow gravitate to using these rather than the longer larger ones I tend to use for hot sauces and general cooking. I don't know if there is a difference in ease of action between a long and short spoon, if anything I suspect a longer handle might make it easier. But I like short ones, they get me closer to the action!

BUT, the most vital piece of equipment for mixing by hand is the bowl.
I love my bowls. I seriously do. I grin every time I get one of them out of the draw. They are proper old school mixing bowls and take me back to watching my Nanna or Mum baking when I was a kid. For years I had a stainless steel bargain bowl that I picked up in a pound shop when mixing stuff in the studenty pasta bowls I had didn't cut it anymore. Then, this Christmas, finally being in a flat I love, with a great kitchen and oven and the person I love who happens to love my baking (which is a good job really since I do so darn much of it) I decided finally to ask for one of these bowl for Christmas.

Father Christmas clearly approves of my baking too as he delivered to me a lovely large bowl (needless to say I did leave him a mince pie so maybe that's what swung it!). I was so overjoyed by it and found it so perfect that I went out a few weeks later and treated myself to a slightly smaller one!
I know it might sound odd to rave on about how good a bowl is, but I wholeheartedly believe that these bowls have been one of the best additions to my kitchenware. They're just so satisfying that I think some of my smugness when I mix in them must make it into the cakes. In the immortal words of a very good friend of mine, these bowls "rock my world."
Monday, 17 March 2008

Monster weekend
This Saturday we had two friends and their 9 year old come and visit to try out a game of Dungeons and Dragons. Knowing how long it would take us to set up characters and then play at least some of a campaign (or quest as we've decided to call it) we decided that we'd better prepare a pretty decent amount of filling food suitable for hacking and slaying.
So, the pizza production line went into action!

We know thought that pizza wouldn't be enough. What we needed was a desert fitting for a group of hungry adventurers to snack on throughout their quest. What could be more fitting than "monster" cookies! I had seen the recipe for these on a blog a while back and had been looking for an excuse to make them for ages. Saturday's D&D session seemed perfect.
So N duitifully raided Woolworth's on Thursday and got supplies (M&MS, fudge etc) and on Saturday morning I threw all the lovely colourful ingredients into a bowl, gave it a stir and had a bash at making Monster cookies. I had cut down the recipe by two thirds and so wasn't sure quite whether it would turn out alright. However, within minutes a lovely peanut buttery, chocolately, fudgy, oaty smell began to fill the flat. Mmm...


They turned out wonderfully. Crunchy on the outside due to the oaks and melted fudge and then slightly chewy on the inside because of the peanut butter, with the nice crunch and chocolatey goodness of M&Ms throughout. A great combination of flavours and textures. Definitely something I'll be making again, perhaps even this weekend! (It's Easter after all and so must be filled with treats!).
Definitely just the thing that was needed to keep us going during a tough battle against a bunch of testy Orcs.
Monster Cookies: (Adapted from Bake or Break)
This is a third of the original recipe and makes about 12 medium sized cookies.
1 egg
1.3oz brown sugar
2.1oz caster sugar
1/3 teaspoon vanilla
1/3 teaspoon maple syrup
1/3 teaspoon baking powder
1.3 oz butter
2.6 oz peanut butter
4.5oz oats
0,.9oz plain flour
1.5oz chocolate chips
1.5oz fudge chips
1.5oz M&Ms
Preheat oven to 350 degrees. Grease/spray/line baking sheets.
Combine eggs, both sugars, vanilla, maple syrup and baking soda in a large mixing bowl. Add melted butter. Next add peanut butter, oats, and flour and mix thoroughly. Stir in the chips and M&Ms. Let the dough rest for about 30 minutes to allow the oats to absorb the butter.
Drop the dough onto baking sheets. Bake for 10 to 12 minutes or until lightly browned. Allow to cool on the trays while the fudge hardens up again (about five/ten minutes) then transfer to a wire rack until they are ready to eat (ie: however long you can hold out against their lovely smell!)
Thursday, 13 March 2008

Wednesday, 12 March 2008
Decadence
Tonight was a celebration: My father has been offered a job for September! Whoo! So we decided to have an indulgent evening in the flat. We immediately cracked open a bottle of wine and out came the recipe lists. Yes, they are mostly on my mac still. Makes a nice kitchen scene doesn't it!

I've been craving chocolate this week and feeling a bit down (I think my work is getting to me and I really feel the need of a break - bring on Easter weekend), so I decided to go uber decedent and make a chocolate cake. This is technically a food adventure too as although I have made plenty of brownies and cookies in my time, I have never attempted a chocolate cake.

I wanted it to be a little bit special so instead of using the coffee suggested in the recipe I added Kahlua. Unfortunately it clearly wasn't enough, as I couldn't really taste it when the cake came out, but I don't think it really mattered in the end.

I timed it perfectly to come out of the oven just before half time in the UEFA cup match we were watching, so by the time it came to half time I could whip some cream without the cacophony of the Kenwood getting in the way of the match, and could serve, with the cake still slightly warm, just in time for the second half.
 N was so pleased with his slice he insisted it was the one I photographed! Needless to say it went down very well, and has certainly satisfied my chocolate cravings for a very long time! It was dark and indulgent and not too sweet with a very satisfying crunch to the top. Another success in the North London Kitchen.
Chocolate Mud Cake
200g butter
200g dark chocolate
25g cocoa powder
4 tbsp Kahlua (this wasn't enough in my opinion, I'd add more next time, maybe double)
1 tsp vanilla
200g caster sugar
3 eggs115g self raising flour
Method
Grease and line an 8inch/20cm springform cake tin and set to one side. Preheat the oven to 160C.
Put the butter, chocolate, cocoa powder, Kahlua and vanilla into a saucepan and place over a low heat to slowly melt. Stir from time to time to ensure even melting. When completely melted, remove from the heat and set to one side to cool slightly.
Meanwhile, beat the eggs and sugar together for 3-4 minutes until pale, thick and creamy, then beat in the flour. Pour the cooled chocolate mixture into the egg mixture in a thin stream, beating all the time. Then beat for a further 30 seconds until light. Pour the mixture into the prepared tin and bake in the oven for 55-65 minutes until a skewer inserted in the middle comes out relatively clean. (I baked for an hour and it was probably a little too long as it gave the cake a crusty top and side, which I love but I can understand people who want their chocolate cake all goo).
I served still slighty warm with whipped cream. It was probably a bit too much for me, but it was an evening of indulgent celebration and I wouldn't have been allowed to get away with not whole-heartedly taking part!
P.S. I should mention that we had a nice light main course of balsamic onion puff pastry trays with dressed salad. It too was very nice indeed, and will no doubt become a regular for us when there are plenty of onions to be used up!

Tuesday, 11 March 2008
A slice of the action in Our Lovely Flat (tm)
Another food adventure tonight, I made pizza!

Okay, this is a first on a technicality only. We actually eat pizza every week, I think I'd be safe in speaking for both of us in putting it high up on our list of favourite foods. We usually have when N plays football in the evening and needs something "snacky" that he can have a small amount of so he doesn't get too full before playing, but can then have more when he gets in. Pizza and salad fits the bill perfectly.
I have always made our own toppings, but using pre-bought pizza bases. However, with the new bread resolution I decided that once the stock of frozen bases ran out I would make everything from scratch. Tonight was the night.
I have very fond memories of making homemade pizza with my father, and it was so nice to smell that lovely olive oily yeasty dough again as I kneaded it and let it rest and prove. I made enough for three bases and froze two portions so that next time I can just whip it out of the freezer, prove it and bake it, without mixing again.
I was so pleased with the results, it was light and elastic and easily workable into a round. I then topped it with my patented (adapted *cough-stolen-cough* from my father) tomato sauce before adding a mix of Italian flavours; sundried tomotes, pesto, walnuts and shaved parmesan. Oh and jalepenos, which no pizza in Our Lovely Flat (tm) would be without!

It was baked in the oven for 12 minutes and then served with my homemade coleslaw* and lettuce.
I know it's not good or nice to gloat, but I am going to because it was one of the nicest pizzas I have ever had (outside of Italy of course). The dough was light and fluffy with crisp edges, it didn't feel at all soggy or cloying. The flavours on the topping all worked really well together too, fresh with a hint of heat from the chili. N and I very enthusiastically stuffed our faces and between bites grinned at each other smugly. He has pointed out that I am now on pizza dough duty forever. To be honest, with results that good from a recipe that easy, I don't care in the slightest!
I really can't stress enough how impressed I was with this dough. I plan on making soft rolls with it and mini pizzas for N's lunch.
* I realise I haven't posted about the coleslaw, I made it on Sunday and totally forgot that it in itself was a food adventure and with all the baking it got overlooked. Basically I grated some kohl rabi and carrot and added a handful of sultanas and dressed it in natural yoghurt, lemon juice and the tiniest dash of salad cream. It's been delicious and I will definitely be making it again.
Sunday, 9 March 2008
I just can't resist...
...when N asks me in that oh-so-sweet-and-pathetic I've-just-had-a-tooth-removed voice "can we have cake?" It comes with the puppy dog eyes too. Awww. So yes, today all my healthy eat-less-cake intentions went out the window and I made more cake. Oops.
To be fair we didn't go out for the indulgent dinner we intended last night so we were at least slightly justified in having a treat this weekend.
N loves mango and we had an over ripe one sitting in the fruit bowl along with a three week old coconut. So I decided to combine the two and make a mango cake topped with lime glace icing and fresh grated coconut. Then, knowing I'd have coconut left over and in a few weeks we have friends coming for dinner, I used the leftovers to make some rough macaroons. I'm not sure if the macaroons will actually hold together, but we shall see.
As you can see from the photo I had a little helper with the coconut! (armed with his hammer and bradawl - key coconut hacking tools!)

Here are the recipes. I actually halved the cake one since there are only two of us, plus I made it in a loaf tin which worked really well. I then glazed it with lime glace icing (100g icing sugar and 3 Tbsp lime juice) and topped with grated coconut.
With the macaroons I just added a bit more coconut and made smaller portions. I am going to freeze them until they're needed, and will drizzle dark chocolate over them.
Mango cake:
170g mango puree – flesh of 1 large mango (just whiz in a blender)
280g caster sugar
250g butter
4 eggs
275g self raising flour
Preheat the oven to 175C. Grease an 8inch/20cm deep round cake tin and line the base with greaseproof paper.
Cream and butter and sugar together until lift and fluffy. Add the eggs, beating well between each one.
Stir in the mango puree. Fold the flour in using a large spoon or spatula until no clumps remain.
Pour the batter into the cake tin and bake for 1hour 25 minutes. (After the first 40 minutes, cover the cake with foil to prevent it from over browning and bake for a further 45 minutes.)

Macaroons (from Abel and Cole)
1 egg white
1 tablespoon sugar
1 teaspoon caster sugar
1/4 teaspoon vanilla extract
optional: 1/8 teaspoon almond extract
1 large handful grated coconut
Preheat oven to 150°C, 300°F, gas mark 2. Butter and flour a baking sheet, knocking off excess flour. Stir everything together all except the coconut and mix until it’s all combined. Then stir in the coconut. Divide into fourths, and drop in 4 mounds onto baking sheet. Bake until tops are golden, about 15 minutes.

P.S. Okay, it might look impressive, but as predicted the macaroons fell apart when I tried to lift them off the tray after they'd cooled. Grr. I have decided to freeze the cooked coconut anyway and later will drop it in melted dark chocolate and make chocolate coconut macaroons instead that will hopefully hold together once the chocolate has set again.
Saturday, 8 March 2008
Birdseed breakfast.


I love lazy weekend mornings, they are the highlight of the week, and part of that is breakfast in bed. Having made the cinnamon rolls last week I've definitely caught the special breakfast bug. Since I am trying to cut down on the amount of cupcakes and general baking indulgence (I could bake every weekend but I know I shouldn't) I decided that making something tasty for breakfast that's indulgent and healthy (well, kind of at least, come on it's the weekend and we're not monks or anything!) would hopefully satisfy both my baking wants and set us up for the day.
So, I took the cinnamon rolls dough recipe (which can be found here), and instead of using a butter and sugar/cinnamon filling, adapted a birdseed filling from "Mad about Bread" by Diana Bonaparte that I had purchased last weekend from the second hand bookshop. The result was a lovely bread roll filled with high fibre delicious seeds and fruit. Crunchy and doughy; lovely. I can see that this formula will become a real winner for breakfasts. I fully intend to try a fresh berry version when our raspberries and blueberries appear in the garden. Ah, just the potential of fresh blueberry and cinnamon swirl rolls is making be hungry all over again!
I won't post the dough recipe again, I will just post the filling ingredients and instructions.
1/3 cup of peanut butter (or just butter if you don't like peanut butter - although what mad fool that could be I don't know!)
Sprinkle of mixed spice and brown sugar (literally a sprinkle, you won't need much, just enough to add some spice)
25g cranberries
25g raisins
30g pumpkin seeds
30g sunflower seeds
20g sesame seeds
20g linseeds
Place the pumpkin and sunflower seeds on a baking tray and place in a oven preheated to 180C for five minutes to toast them. Meanwhile dry fry the linseeds and sesame seeds until just lightly browned. These techniques will bring out the flavour of the nuts more and make them nice and crunchy. Then place all these ingredients in a bowl with the raisins and cranberries and combine as well as possible. Put the peanut butter in a heat proof jug and microwave for 30-40 seconds to make it warm enough to spread thinly and easily.
Roll out the dough into a large rectangle. Thinly spread the peanut butter over the dough, sprinkle with the sugar and spice and then cover with the seed and fruit mixture trying to get as even a distribution of the various ingredients as possible. Roll the dough towards you into a swiss roll and seal as well as possible. Cut it into 3/4 inch pieces. Place on a baking tray that is either greased of covered in baking parchment. Allow to rise for 30 mins. When risen bake for 15-20 mins (mine took 15) until golden.
You can easily do all this the day before (as I do) and then just toast under a preheated grill for a few minutes to make them crispy again.
Mmm, tasty birdseed breakfast!
Friday, 7 March 2008
Playing catch-up
It seems like a little while since I posted about the food adventures part of our new years resolution; remember, the part where we have to try out at least one new recipe a week? Well, technically we have been trying new recipes because the bread and cakes I have been baking have been totally new to us. However I don't want to lose track of the savoury side of things. Although there is a bit of a sweet tooth in Our Lovely Flat (tm) we also eat tonnes of vegetables. It's kind of hard not to being vegetarians who love food.
So this week, the arrival of our Abel and Cole box prompted me to get adventurous. It had some lovely fresh broccoli and parsnips in it and not wanting to risk losing their freshness (I somehow always manage to forget about parsnips and discover them days later slightly wrinkled and squidgy) I decided to have an evening of experimentation.

The first thing I did was raid my recipe scrap book looking for the Apple and Parsnip soup recipe I had cut out of the Observer months ago. Alas I can't remember which chef recommended it, but I thought I'd have a bash anyway. I thought I would make it straight away to catch the freshness of the veg and then freeze it so on a future occasion when neither of us fancied cooking we would have tasty healthy "fast" food.
I had to adapt the recipe as I didn't quite have enough parsnip, but I figured with it only being the two of us it wouldn't matter too much. It smelt nice, and hopefully it will taste nice too. Updates to follow as and when.
I then set about making dinner for that evening (Wednesday). I wanted something simple but healthy and very tasty. I decided to make a pasta dish with the broccoli. The photo doesn't really do it justice as it was a real success, very simple to make and so tasty it didn't even feel righteous! It was totally of my own invention, and I was very pleased to see N grin while munching it. I've called it "pesto broccoli" because essentially that's what it is!

And now for the recipes:
Apple and Parsnip soup (adapted from an Observer Food Monthly recipe - I've just transcribed it as I made it)
2 large parsnips sliced (they were pretty large I have to say!)
1 large onion sliced
2 small apples sliced (the recipe said peel them, I didn't bother as we use organic and I think the peel adds flavour)
1 1/2 pints vegetable stock (I forgot to use the frozen stock I'd made, I must remember next time)
1 bay leaf
small handful of fresh thyme
freshly ground black pepper
knob of butter
Melt the butter in a large pan. Once melted saute the onions until soft but not golden, add the parsnips and cook until slightly tender. Add the bay leaf and thyme and cook for a few minutes. Then add the stock and bring to the boil. Simmer until the parsnips are tender. Remove from the heat and add the apple, stir well and then when slightly cooled place the place in a blender, removing as much of the liquid as possible and whizz until smooth, slowly adding the liquid to get the consistency you prefer. Replace on the heat briefly, but do not boil, before serving.
Pesto broccoli pasta
1 1/2 heads of broccoli (basically enough for two people)
two spoons of pesto (I used it from the jar, but will use fresh as soon as our basil grows!)
two spoons of cream cheese
freshly ground black pepper
NB I didn't really measure the cheese and pesto, I just used a normal spoon from the cutlery draw.
Steam the broccoli until slightly tender, maintaining the lovely colour and crunch. Once it is ready shake off the excess water and in another pan over a low heat mixed together the cream cheese, pesto and pepper until it was slightly melted and well combined, then add the broccoli and stir until well coated. Serve immediately with pasta of your choosing.
Enjoy, we certainly did!
Spring in North London?

The apple blossom clematis has begun to flower and the seeds we planted a few weeks ago have begun to grow; could Spring finally be here? Hurrah!

Wednesday, 5 March 2008
A photo essay: yesterday I was mostly...

(...admiring this lovely retro bike and its amazing wicker basket. I think something like this would go very well with my red shoes, don't you?!)
Monday, 3 March 2008
Dedication to the cause (Or, bread and books)
We spent our lazy Sunday yesterday pursuing one of our favourite pastimes: buying books. There is something so wonderful about browsing in book shops, and I must admit that N and I do it very well indeed. So well in fact that seven hours can slip by with us barely noticing. Opps!
We returned to the flat very smug indeed with a bag full of lovely purchases, and the smell of secondhand bookshops lingering on our clothing. However, there was no incentive to cook (too many books to look at) and certainly no incentive to bake bread. We ordered a curry and settled down with the taped match in front of us and our newly acquired books littering our laps and sofa.
It was past half eight when we finished eating and I was so tempted to give in and just get some emergency store bought bread out of the freezer (we have three loaves in there from pre-baking resolutions which are agreed to be emergency loaves). But something in me just wouldn't give in. I knew we'd be going to bed late-ish and figured that bread would take a maximum of three hours with resting, proving and baking. So, with N ploughing through one of his new books and yelling match highlights at me down the flat I quickly threw ingredients into a bowl. Using the wonderful pecan and cranberry recipe (mentioned earlier somewhere in my bread making posts), as a guide I made a wholemeal nut and seed loaf using half pecans, half walnuts and a large handful of pumpkin seeds.
Since I know the proportions of flour, water, salt and yeast by heart now all I had to do was work out how much of the nuts and seeds to use (70g nuts, 30g seeds). I then left it to rest and prove as the recipe recommended and baked it for 40mins. By 11.45pm we had a lovely crusty new loaf ready for the morning and the smell of fresh bread to waft through the flat as we lay reading in bed.
It was great, and proves that a little dedication to the cause is always worth it. Books and bread, numbers two and three on my favourite things list.
Another successful lazy Sunday.

Saturday, 1 March 2008
Baking Day! (March) Finale: Afternoon tea
Whilst pondering what we should have as this months Baking Day treat N wondered out loud as to whether I could make scones and suggested we make it afternoon tea. It was as if he took the thought right out of my head. The weather has been more and more Spring-like and I have been seeing scones cropping all over blogs in the past few weeks which has put them in my mind several times.
So I got on the phone to the Domestic Goddess Hotline (Mum) and picked her brains for the amazing scones recipe that frequented my childhood. I was chuffed to discover it came from her Mum, my Nanna, who I know would have been really pleased to hear about my new-found love of cooking, baking and all round Domestic Goddessry.
Cream and jam were added to our shopping list, and N returned home from work yesterday brandishing two punnets of simply sumptuous looking strawberries (okay, not quite in season, but sometimes it just has to be done).
Then this afternoon, with cupcakes cooling and the first pangs of hunger after breakfast showing themselves, I set off on my first ever try of "Mummy's Scones"


I left them in for a little too long, underestimating how quickly our oven can cook things, but despite being slightly darker than I would have liked they still tasted delicious, just like I remember. Another Baking Day success. Mmmm...

The recipe I'm afraid will remain a closely guarded secret!
Baking Day! (March) Part Two: More cupcake madness!
My recent obsession with cupcakes is somewhat taking over my life. I have been ordering all sorts of cute and exciting sprinkles to decorate them with and thinking up all sorts of batter/icing flavour combinations. I have even been dreaming about making them! Sad, but true.
So, although N had asked for something else to be the centre of Baking Day (post on it's way...) I just knew I had to indulge the cupcake fixation.
I didn't want anything too rich, and after a week of glorious late-February sunshine I wanted something to reflect the refreshing taste of Spring we've been having. So I decided to make citrus cupcakes; one set of orange, one set of lemon. I used a recipe for lemon cupcakes, and before adding the lemon juice and zest split the batter so I was able to mix one half with lemon juice and zest and the other with orange. The only problem being that I needed to remember which was which!

Once the cakes had cooled I decided to try out different icing combinations too. So, I iced six lemon with lemon cream cheese icing, and six lemon with orange buttercream, and then had six orange with lemon cream cheese icing and six with orange buttercream meaning I had one of each type of cake with each type of icing.

Ah, cupcake obsession sated for one weekend at least!

Now for the recipe: It was taken from the Cupcake Bakeshop blog, which I can't recommend too highly. I then adapted it for the orange ones. I have no idea how they've turned out as we haven't actually gotten around to eating any, but the batters smelt lovely whilst cooking and rose really well.
Lemon Cupcakes
12 regular cupcakes / 180 degree oven
8 tablespoons (1 stick) unsalted butter, room temperature
1 cup sugar
3 large eggs
11⁄2 cups all-purpose flour
1 teaspoon baking powder
1⁄2 teaspoon salt
1 teaspoon pure vanilla extract
1⁄2 cup milk
3 tablespoons fresh lemon juice
zest of one lemon
1. In the bowl of an electric mixer fitted with the paddle attachment, cream butter and sugar until light and fluffy, about 2-3 minutes.
2. Add eggs, one at a time, beating until incorporated.
3. In a medium bowl, whisk together flour, baking powder, and salt.
4. Measure out milk and vanilla.
5. Add flour mixture and milk alternatively, beginning and ending with flour mixture.
NB: At this point I split the batter and added half the amount of lemon needed to one and the equivalent of orange to the other.
6. Mix in lemon juice.
7. Fill the cups about 2/3 full and bake at 180 for 20 minutes until a cake tester comes out clean.

Baking Day! (March) Part One: Breakfast


Okay, so technically I start this months Baking Day yesterday, but I figured that since it was February 29th, a sneaky extra day, it doesn't really count! The reason I started early was because I wanted to try out a new recipe for Baking Day breakfast and had no intention of getting up early in order to make it.
The reason it needed making early was because I was trying out cinnamon rolls using a dough that required time to rise. So yesterday morning I donned my apron early and set off on a quest for breakfasty goodness. It was much easier than I expected; a simple sweet bread dough that once rested (for an hour) and risen was rolled out was spread with melted butter and a sugar and cinnamon mix. It was then rolled and sliced to produce the cute looking Swiss roll type chunks and proved for another 30 mins before putting in the oven for 15 mins.
The smell was good before the baking had even begun, and once they were in the oven an amazing cinnamony, bready aroma filled the flat. It was going to be really difficult to hold out trying them before breakfast!


Fortunately I did manage to hold out until this morning. Back they went in the oven for a quick re-reheat to toast up the edges, then they were drizzled with lemon cream cheese glaze and served up with our morning coffee. Totally delicious. They will definitely be becoming a staple of our weekend morning routine.

Subscribe to:
Posts (Atom)